The unofficial OpenCV PyPI
wheels
work with pip install methods:
pip install opencv-python
For ARM / Raspberry Pi:
pip install opencv-python
also works for certain ARM platforms like the Raspberry Pi.
OpenCV is trivial and fast to install on a Raspberry Pi via pip as described above.
For the latest extended functionality that hasn’t yet been incorporated into the core package, OpenCV including the
Extra contributed modules
may be obtained by:
(reference) Windows-only OpenCV wheels.
(cpMN where you have Python M.N). contrib includes OpenCV-extra packages.
If ... is not supported on this platform error be sure it’s using desired Python install.
One may have to manually specify the path for the pip command e.g.
We made several test
scripts
to try out the OpenCV install.
Compiling OpenCV yourself allows customizing and optimizing OpenCV for your computer (e.g. using GPU, TBB, OpenCL, etc.).
The conda install opencv and conda install -c conda-forge opencv methods for OpenCV continue to be BROKEN for video/image reading and display.
Use pip install above instead.
If YouTube won’t accept a video upload, or the video never completes “Processing” on YouTube, try re-encoding the video with FFmpeg.
Sometimes lossy conversion is necessary to achieve the YouTube
recommended upload settings.
Periscope video downloads use
MPEG TS container
with .ts file extension.
These .ts files can be played back in VLC or similar to confirm content.
A lossless conversion to YouTube is possible with:
Generating a range of datetime data is a common data analysis and simulation task.
Here we show examples of generating datetime vectors for Python datetime and numpy.datetime64
Python
datetime
is often used as
timezone-naïve
with UTC as the assumed timezone.
This custom
avoids ambiguities
when working with Pandas and Numpy, which are foundational for Python data science.
Generate a range of Python datetime like:
from__future__import annotation
fromdatetimeimport datetime, timedelta
defdatetime_range(start: datetime, end: datetime, step: timedelta) -> list[datetime]:
"""like range() for datetime"""return [start + i * step for i inrange((end - start) // step)]
dt = datetime_range(datetime(2019, 12, 1), datetime(2020, 4, 1), timedelta(days=1))
Matlab
datetime
works much like Python datetime, and is generally recommended.
Matlab plotting functions generally support “datetime” class.
It is sometimes necessary to manipulate Matlab plots involving datetime for the desired result.
After updating an operating system graphics driver while Matlab was open,
an error may occur upon plotting in Matlab like:
MATLAB has experienced a low-level graphics error, and may not have drawn correctly.
Read about what you can do to prevent this issue at Resolving Low-Level Graphics Issues then restart MATLAB.
The solution to this issue typically is, as the message suggests, just restarting Matlab.
A full reboot is not always necessary, but try that if the error persists.
Skipping a test with Meson or CMake by returning error code 77 is a de facto practice.
Sometimes it is only feasible to know a test should be skipped by attempting to run that test.
The
vcgencmd
utility allows reading a few dozen hardware measurements on the Raspberry Pi boards.
CPU Temperature is checked by:
vcgencmd measure_temp
Typical temperatures in office environment, with case:
Pi Model
heatsink
usage
temp [C]
2B
yes
light-moderate
40..45
4B
no
light-moderate
65..70
4B
no
YouTube 720p60
85
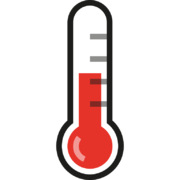
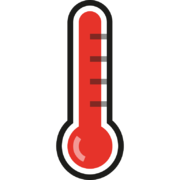
A red thermometer icon GPU-superimposed on the Raspberry Pi display output means the Raspberry Pi is overheating and is throttling the CPU and GPU to avoid self-destruction.
Raspberry Pi 0, 1, 2, 3 temperature thresholds:
CPU temp. [C]
icon
throttle
< 80
none
none
80 - 85
CPU
> 85
CPU & GPU
Raspberry Pi 4 temperature thresholds:
CPU temp. [C]
icon
throttle
80 - 85
none
CPU: 1000 MHz
85 - 90
CPU
> 90
CPU & GPU
The current Raspberry Pi CPU clock speed is obtained from
vcgencmd measure_clock arm
The output is in units of Hertz.
The Raspberry Pi CPU clock speed and
power consumption
is dynamic:
clock speed [MHz]
Raspi 2
Raspi 3
Raspi 3+
Raspi 4
idle
600
600
600
600
100% one or more cores
900
1200
1400
1500
Log temperature measurements with crontab -e.
This can periodically log temperature and CPU frequency, e.g. add a line like:
@hourly vcgencmd measure_temp | /usr/bin/logger
logger
writes the measured parameters into the system log.
Many basic Git use cases involve a main branch with feature branches periodically merged into the main branch.
For certain purposes, totally distinct branch without a common history can exist in the same Git repo.
One of the most common uses of this is for documentation.
For example, GitHub will build a website from the gh-pages branch.
What happens next depends on if your documentation files were already added to another branch (tracked) or were not added to Git (untracked).
Assume wanted files for the blank gh-pages branch are in docs/ on main branch.
copy over the files to gh-pages
git checkout main -- docs/

git commit -am "moved docs"
Python 3.6 f-strings have been shown to be the fastest string formatting method in microbenchmarks by Python core dev
Raymond Hettinger
benchmark
relative speed factors:
f-string: 1.0
concatenate string: 1.33
join sequence of strings: 1.73
%s formatting operator: 2.40
.format() method: 3.62
Template() method: 11.48
The reason for this speedy performance was described by Python core dev
Serhiy Storchaka.
Goldwave 5.x
is stable and the recommended version to use on Linux via WINE.
An open source alternative to Goldwave is
Audacity.
If using Goldwave on Windows directly:
winget install --id=GoldWave.GoldWave
To use Goldwave on Linux via WINE:
Install Goldwave prereqs.
32-bit WINEPREFIX is mandatory due to wmp10 prereq.
This creates a 32-bit winearch (default .wine directory is 64-bit).
The default install options are fine.
Install Goldwave in WINE.
WINEPREFIX=~/.wine32 wine gwave5*.exe
This also creates a Goldwave icon in the Ubuntu apps menu.
Configure soundcard in Goldwave by:
F11 key → Control Properties → System tab
click Use DirectSound AP radio button
click OK to save configuration
Select “loopback” what you hear audio under F11 → Device → Record and pick Loopback Pulseaudio.
Test Goldwave 5 by F11 key → Device tab and click Test playback button to hear a brief test tone.
Create new/save/play sound files with Goldwave 5.7 in Linux WINE
These settings are useful for Goldwave on Windows as well as WINE/Linux.
Constantly monitor audio levels: F11 → Record → monitor input
label VU graph axes in dB: Right click VU meter → Properties → Show Axis
It’s recommended to use Goldwave 5.x as above on WINE instead.
There are some errors but Goldwave 6 still works to record and playback on WINE ≥ 2 using a Windows 7 Wineprefix.